
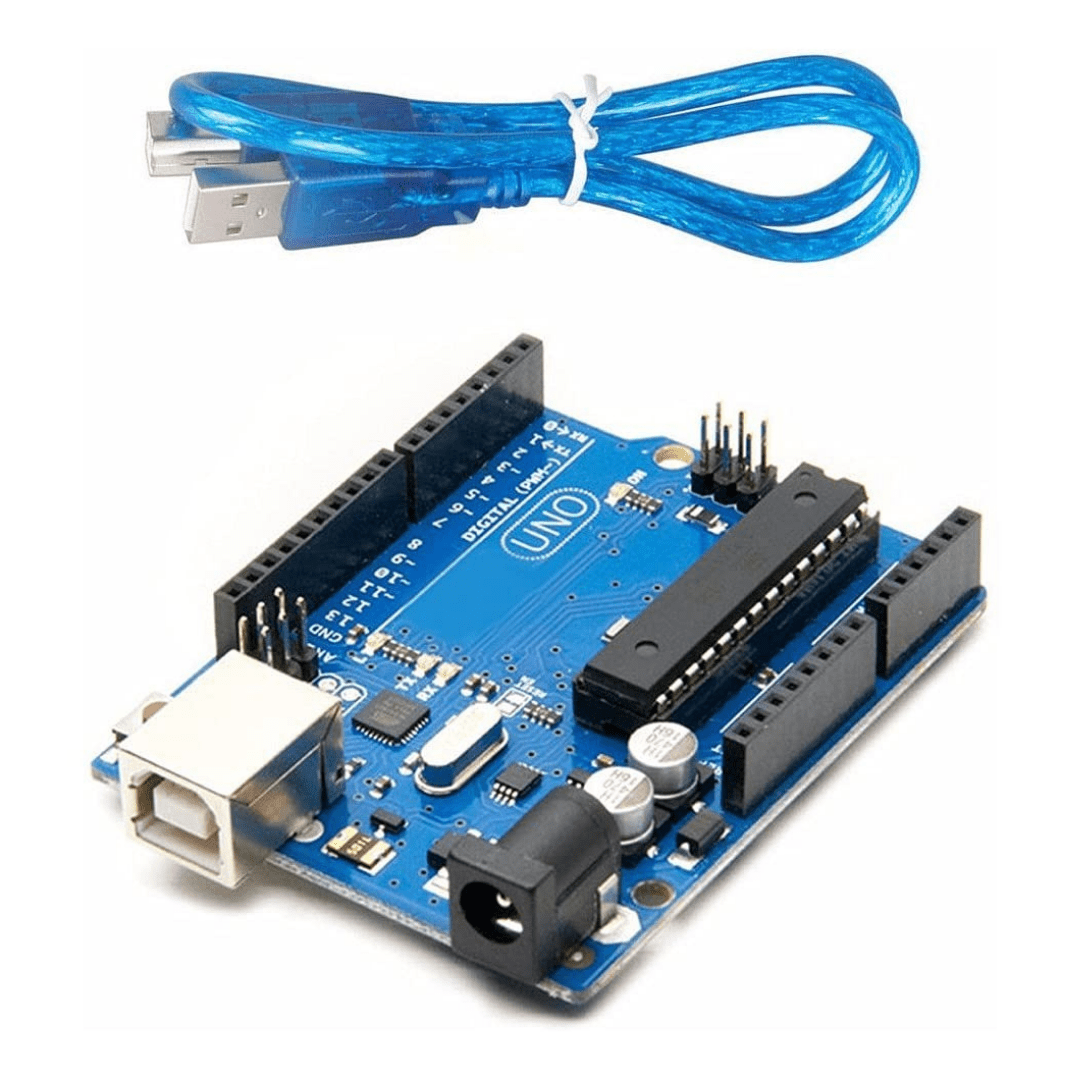
Arduino Uno R3 Development Board ATmega328P With USB Cable - Vayuyaan The Arduino UNO is the best board to get started with electronics and coding. If this is your first experience tinkering with the platform, the UNO Development Board is the most robust board you can start playing with. The UNO is the most used and documented board of the whole Arduino family. Arduino Uno is a microcontroller board based on the ATmega328P. It has 14 digital input/output pins (of which 6 can be used as PWM outputs), 6 analog inputs, a 16 MHz ceramic resonator (CSTCE16M0V53-R0), a USB connection, a power jack, an ICSP header, and a reset button. It contains everything needed to support the microcontroller; simply connect it to a computer with a USB cable or power it with an AC-to-DC adapter or battery to get started. “Uno” means one in Italian and was chosen to mark the release of Arduino Software (IDE) 1.0. The Uno board and version 1.0 of Arduino Software (IDE) were the reference versions of Arduino, now evolved to newer releases. The Uno board is the first in a series of USB Arduino boards, and the reference model for the Arduino platform; for an extensive list of current, past, or outdated boards see the Arduino index of boards. How to use Arduino Uno R3: If you want to program your Arduino Uno while offline you need to install the Arduino Desktop IDE. The Uno is programmed using the Arduino Software (IDE), our Integrated Development Environment common to all our boards. Before you can move on, you must have installed the Arduino Software (IDE) on your PC. Connect your Uno board with an A B USB cable; sometimes this cable is called a USB printer cable. The USB connection with the PC is necessary to program the board and not just to power it up. The Uno automatically draws power from either the USB or an external power supply. Connect the board to your computer using the USB cable. The green power LED (labeled PWR) should go on.
You may like

As the global edible oil market continues to evolve, many industry participants are asking an important question: Will…

If you're tracking the Benzoic Acid market, timing your purchase can make a significant difference. Many buyers are…

The Naphtha Price Trend is an important indicator for businesses involved in petrochemicals, refining, plastics, and…